GTJC460
~ Elite 1000 Member ~
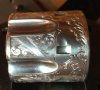
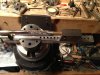
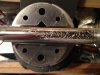
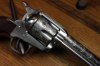
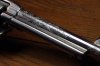
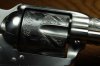
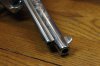
This is a Taylor's SAA (Uberti) I just started. I've got the backstrap finished and the cylinder about 1/2 way complete. I'm using a combination of 1800's and 2010 patterns from Mike Dubber.
This is my first one, so I figured I use a good pattern instead of fighting design issues. It's been a learning experience so far. The shovel head was particularly difficult. At least I'm having fun at it.
This is my first one, so I figured I use a good pattern instead of fighting design issues. It's been a learning experience so far. The shovel head was particularly difficult. At least I'm having fun at it.
Attachments
-
 image.jpg71.3 KB · Views: 432
 -
 image.jpg49.6 KB · Views: 427
 -
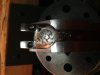 image.jpg57 KB · Views: 430