ChrisB
Elite Cafe Member
Hi All,
Having to take it easy and also banned from the Knife workshop by the BOSS!!
For A while ? (Due to a recent Heart Attack)
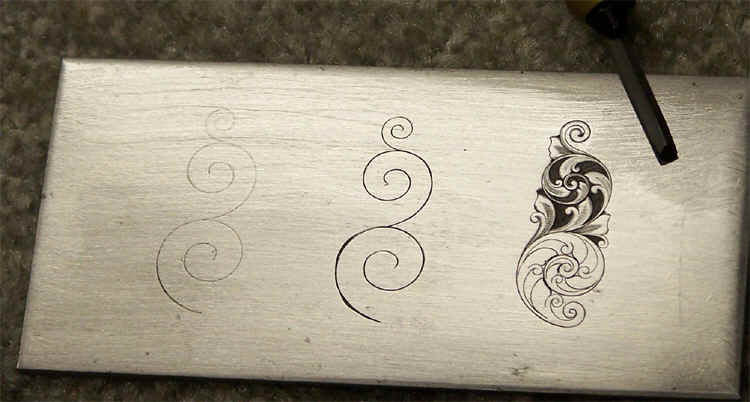
I was Messing around with some drawings and new logo's for my Knives, then it Struck Me!!
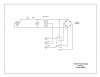
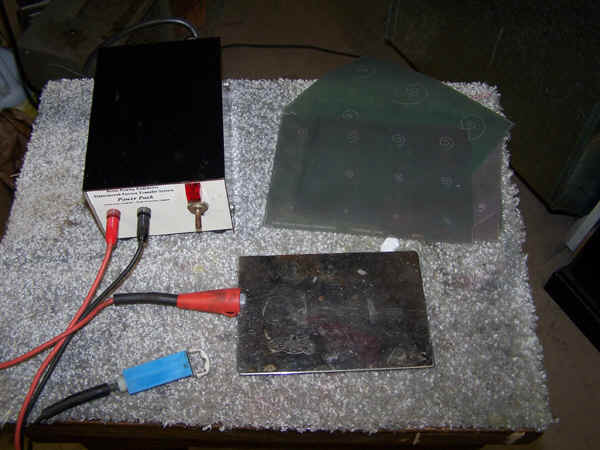
I recently Bought a "Etch-o-Matic" etching system with the stencil Maker from Martronics in the USA.
The Old Method of Clear stencils Pheric Cloride and Positive-20 takes to much time and Hassles.
Why not make a stencil for one of my engravings for the hunters and try it.?
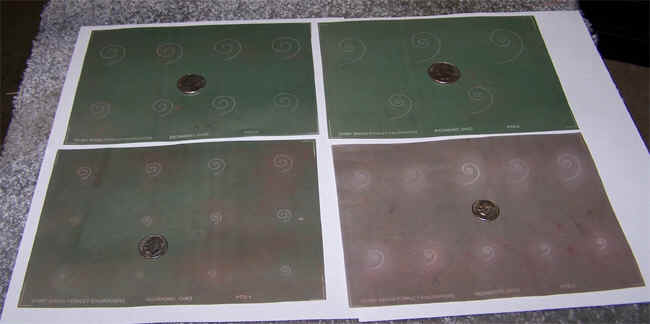
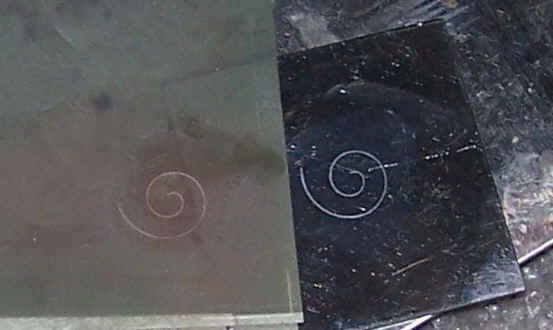
I did one and it works like a dream,")
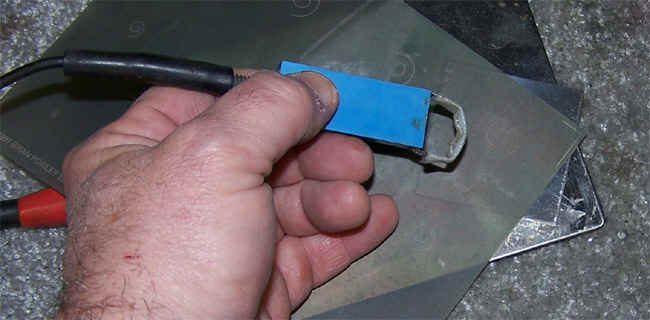
It's a Fine Silkscreen Media that You develop your image onto, then you just put in in place, use the Etching block and it makes a perfect fineline marking on the steel, I tried it on a variety of st/st that i use in my knifemaking and it marks them all. in minutes.
They Also Say that it will mark any conductive metal,!! I will try it out this weekend on Brass,Copper,Nickle Silver, Aluminium Etc. And post reply.
You can even use the same stencil and just turn it around for a mirror image !!
It lines up Perfectly the same as a Clear Transparency.
And You can use it over and over, Perfect for repetitive jobs !! also at a fraction the price of a Epson Sheet. That You can only use once.!!
It Only takes about 5 min. to produce a stencil !!
They Also supplied a Glass etching Sample, which I Marked a beer glass for my son, with his Racing logo on it
curved both ways, it came out Great.!!!
The Unit sold for $200.
Having to take it easy and also banned from the Knife workshop by the BOSS!!
For A while ? (Due to a recent Heart Attack)
I was Messing around with some drawings and new logo's for my Knives, then it Struck Me!!
I recently Bought a "Etch-o-Matic" etching system with the stencil Maker from Martronics in the USA.
The Old Method of Clear stencils Pheric Cloride and Positive-20 takes to much time and Hassles.
Why not make a stencil for one of my engravings for the hunters and try it.?
I did one and it works like a dream,
It's a Fine Silkscreen Media that You develop your image onto, then you just put in in place, use the Etching block and it makes a perfect fineline marking on the steel, I tried it on a variety of st/st that i use in my knifemaking and it marks them all. in minutes.
They Also Say that it will mark any conductive metal,!! I will try it out this weekend on Brass,Copper,Nickle Silver, Aluminium Etc. And post reply.
You can even use the same stencil and just turn it around for a mirror image !!
It lines up Perfectly the same as a Clear Transparency.
And You can use it over and over, Perfect for repetitive jobs !! also at a fraction the price of a Epson Sheet. That You can only use once.!!
It Only takes about 5 min. to produce a stencil !!
They Also supplied a Glass etching Sample, which I Marked a beer glass for my son, with his Racing logo on it
curved both ways, it came out Great.!!!
The Unit sold for $200.