chris: i just looked at your sharpening video. your use of the giant graver models goes a long way to letting folks get proper results without all the confusion over "words". this is an excellent tutorial, and i know it will help a lot of engravers get over their reluctance to experiment with different angles on their gravers. thanks for doing this.

You are using an out of date browser. It may not display this or other websites correctly.
You should upgrade or use an alternative browser.
You should upgrade or use an alternative browser.
More graver control when hand pushing gravers without a heel [photo]
- Thread starter Arnaud Van Tilburgh
- Start date
Arnaud Van Tilburgh
~ Elite 1000 Member ~
Pencil tutorial on easy inside ring lettering.
Introduction:
It is over 25 years I’m trying to do decent inside ring lettering.
I have seen hundreds of them during my goldsmith career but never came close to what I saw although I was convinced it shouldn’t be hard to do.
This kind of lettering was done before there were machines, and the machines made an end at this kind of lettering. Over 20 years ago I saw one in Antwerp who still did some hand lettering, no ballvise, no power hone, no power assist. Just a wooden block and a graver, a sort of flat one.
I have shown this kind of lettering here on the forum questioning about the how, but never got the right answer. You showed me nice roman lettering on inside rings, also cursive lettering, but never the “handwriting character lettering”
When I bought my GraverSmith, I thought it would be piece of cake now, but is wasn’t.
The last 2 days I only practiced using different gravers and graver geometry .And yes, all pieces of information I had brought me the solution.
And let me be clear, it is only for one type of lettering, the only kind of lettering that I saw on inside wedding bands.
Explaining the Tutorial:
The pencil design should speak more than a 1000 words but some extra information will help.
First of all, ONLY HAND PUSHING. Using a graver with extra lift (20° – 25°).
Could be a Bulino graver without a heel but extra lift, or any V graver that is less wide than 105°
I prefer an Traditional small flat hand graver, ½ mm wide. Ad a 20° “lift facet” (lift angle). Face 50°.
The length of the “lift facet” (long heel) is about 5-6mm.
I’m right handed so I only use the left tip of the flat graver to make just one kind of a cut, the hook!
Every cut is made from thin to wider (tapered)at the end. By using the left tip of the flat, the flat will cut a flare, that flare suggests the line is curved . At the end of that cut, the bottom, make a very small flared turn.
I use some Sam ALfano Transfer wax on silver and gold to draw the layout first with a pencil.
Make sure all letters are at 45°, not only does that look great, it is easier to cut and the letters are a bit bigger if you do lettering on the inside of a 3mm wide wedding ring.
Make the height of the lettering like a c e o u v w something between 1,5mm and 3,5 mm. smaller lettering is easier to do and looks better.
No cut will touch a neighbor. It is the eye that will fill in that what isn’t cut. If you try to connect everything, it will look like crap.
Start making all the cuts from top to bottom. 2 cuts for an a, one cut for an e, two cuts for an r etc…
Then you make all the cuts from bottom to top, also the small cut that will connect the letter a to the next one and the small cut at the bottom that connects the first HOOK cut with the next one. And so on.
The horizontal cut for the letter t, is made by pushing the graver from top, on the right tip of the graver, a bit forward and more to the left were it connects the first long HOOK cut.
I will work on a video tutorial ASAP.
I will also show you photos of my lettering. At the moment I make that much progress that I have to wait until I have one the best I can.
Arnaud
Click on the design to see it at full size to see and understand better.
Last edited:
Arnaud Van Tilburgh
~ Elite 1000 Member ~
Here is one quick shot at home some lettering hand pushing on a Titanium ring

[video=youtube;gmHhcZGoy6A]http://www.youtube.com/watch?v=gmHhcZGoy6A&feature=youtu.be[/video]
arnaud
[video=youtube;gmHhcZGoy6A]http://www.youtube.com/watch?v=gmHhcZGoy6A&feature=youtu.be[/video]
arnaud
Last edited:
Willem Parel
~ Elite 1000 Member ~
Thank you very much Arnaud for this detailed explanation and the effort you put in this project to share this with us.
One question, why ONLY HAND PUSHING ? doesn't this work with air assist?
One question, why ONLY HAND PUSHING ? doesn't this work with air assist?
Arnaud Van Tilburgh
~ Elite 1000 Member ~
Willem, NO, it doesn't work with power assist. First of all because you need a graver without a heel that is controlled best when hand pushing.
Second the cuts are short ones, and as any Power Assist system drives the graver forwards, you won't have good control when pushing a bit forward and to the right at the same time.
arnaud
Second the cuts are short ones, and as any Power Assist system drives the graver forwards, you won't have good control when pushing a bit forward and to the right at the same time.
arnaud
bram ramon
Elite Cafe Member
Go to TNA Antwerp there you have Joris Faes who is a night class teacher; engraving and stone setting. He is my ex teacher and one of the best inside ring engravers i have ever seen! His tools Simple wooden block with a hole, a cloth to put between the ring and the block and a NORMAL push graver an his very strong hand!
Thank you Arnaud! I've added your posts to the Tips Archive.
Marcus Hunt
~ Elite 1000 Member ~
This is all very interesting. What you guys are referring to as "no heel" I've always referred to as a long heel. Instead of my normal 1/4mm EasyGraver heel I just kept the graver on the lap longer and increased it to 3mm or so, hence the name "long heel".
Ditto Sam.
silverchip
~ Elite 1000 Member ~
Now the challenge is a size 3 ring!!!!!!!
Brian Marshall
~ Elite 1000 Member ~
Naw...just take a hammer and whack the size 3 finger until it swells up to fit a size 6 ring...
Faster, and gives you more room to work.
Brian
Faster, and gives you more room to work.
Brian
Arnaud Van Tilburgh
~ Elite 1000 Member ~
OK, you want to challenge me, here is a quick one less than size 2. (diameter 13mm) circumference 41mm) 
In my opinion ring size don't matter, yes perhaps a mouse ring would be hard. :biggrin:

arnaud
In my opinion ring size don't matter, yes perhaps a mouse ring would be hard. :biggrin:
arnaud
Last edited:
Chujybear
~ Elite 1000 Member ~
It is sweet, and simple appearing.
On paper that is
On paper that is
Southern Custom
~ Elite 1000 Member ~
Thanks so much Arnaud. I've tried this on and off for 20 years now. Normally I catch on to things pretty quickly but inside rings is one of those things that is just tough to do. Frustrates the heck out of me and I end up putting it aside for "another day". That day is always a few years later. Repeat process.
I've since become a pretty good script cutter so maybe I can transfer some of that skill to the inside of a ring.
With your tutorial here, I think it's time to put some serious effort into it. Thanks for taking the time out to do this. I'll be sure to post my experience and anything I find that helps me.
Layne Z.
Arnaud Van Tilburgh
~ Elite 1000 Member ~
Layne, yes you should give it a try, Me too I wanted to master this for over 25 years, and finally I'm pleased with the result.
Now one thing, I'm showing this quite blown up sized and it isn't meant to look at it that way. With the naked eye it looks much much better as your eyes just fills in the missing connections.
The mistake I made over the years when trying this, is you want to cut all the curves, and then it looks like crap.
Chujybear, thanks,
Here is my one graver withoutt a heel to cut all curves for lettering by hand pushing inside ring

arnaud
Now one thing, I'm showing this quite blown up sized and it isn't meant to look at it that way. With the naked eye it looks much much better as your eyes just fills in the missing connections.
The mistake I made over the years when trying this, is you want to cut all the curves, and then it looks like crap.
Chujybear, thanks,
Here is my one graver withoutt a heel to cut all curves for lettering by hand pushing inside ring
arnaud
Southern Custom
~ Elite 1000 Member ~
I've made those same mistakes over the years. Trying to join things up and such. And your rings look great!
Layne
Layne
Terrezar
Elite Cafe Member
Arnaud, what do you use for holding the ring when engraving it? Oh, and by the way; beautifull work 
Arnaud Van Tilburgh
~ Elite 1000 Member ~
Thanks all,
I use the Chris DeCamillis inside ring fixture you can buy from Tira's http://www.engraver.com/inside-ring-engraving-fixture/
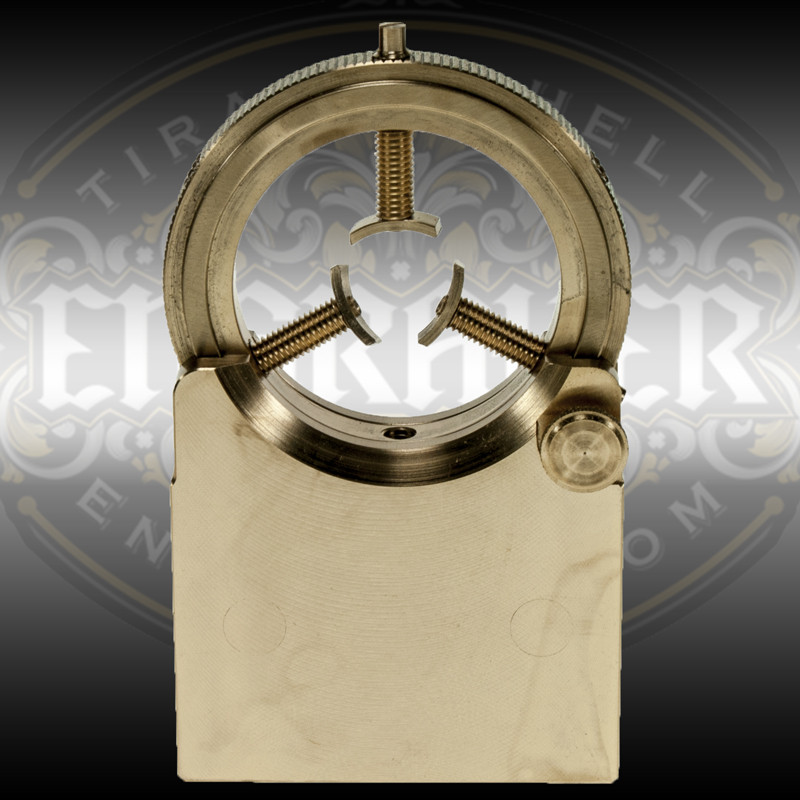
arnaud
I use the Chris DeCamillis inside ring fixture you can buy from Tira's http://www.engraver.com/inside-ring-engraving-fixture/
arnaud
Sponsors


