Critique please

thughes

:::Pledge Member:::
::::Pledge Member::::
Joined
Sep 28, 2010
Messages
838
Location
Nashville TN
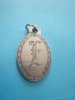
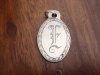
Just a little practice piece, but it's the first time since some surgery 3 weeks ago that I've actually been able to sit down comfortably for a little while. It's an old English E that I took right out of a book, but it kinda looks like an F to me. This is my first try at a running wheat border since my class with Tira a while back. And then I only did straight lines.

Thanks for looking
Todd
 

Attachments

  • Sevierville sinkholes, Dec 2011 023.jpg
    Sevierville sinkholes, Dec 2011 023.jpg
    73.9 KB · Views: 351
  • Sevierville sinkholes, Dec 2011 022.jpg
    Sevierville sinkholes, Dec 2011 022.jpg
    78.5 KB · Views: 347

Andrew Biggs

Moderator
Joined
Nov 10, 2006
Messages
5,034
Location
Christchurch, New Zealand
Hi Todd

Looks good. Nice to see you doing actual pieces.

Try putting a lot more shading lines in. That gives the running wheat border a lot more depth. Another would be to just make them a little shorter and not so long.

Cheers
Andrew
 

RoycroftRon

Elite Cafe Member
Joined
Apr 11, 2007
Messages
265
Location
Buffalo, New York, United States
I would not be afraid to let the vertical elements get closer to the bottom of the E. That would held distinguish it as such and not an F.

Keep up the work! I had a bad gash to my thumb on my tool hand in the beginning of December - right on the outside of the knuckle (7 stitches). I thing jumping back into the work right away helped my mental and physical recovery.
 

Sam

Chief Administrator & Benevolent Dictator
Staff member
Joined
Nov 6, 2006
Messages
10,491
Location
Covington, Louisiana
Todd: Here are a couple of changes I made for your consideration.

1.) cut the boat shapes of the running wheat leaves a bit wider, and bevel them to the inside of the leaf.
2.) space the notches out so the bottom one is near the tip of the next leaf below. Engrave the notches facing more forward as I have done, as opposed to facing left and right.
3.) Since the boats will be cut deeper, you can cut deeper shading lines and have them converge as they approach the boat below. And since the boats will be deeper, the deeper shading chips will break off freely.
4.) shade through the bottom notches.


running_wheat.jpg
 

thughes

:::Pledge Member:::
::::Pledge Member::::
Joined
Sep 28, 2010
Messages
838
Location
Nashville TN
Andrew, Ron, and Sam,
Thanks very much for your advise and comment. It's certainly not very pretty yet, especially not magnified, yuch. But I need those kinds of comments. My hands don't seem real steady yet, but I'll do another one soon and try what y'all said. Thanks again.
 

Tira

~ Elite 1000 Member ~
Joined
Nov 9, 2006
Messages
1,551
Location
Doylestown, PA
Todd, Glad you are back and recuperating. Sam gave you some great tips on the wheat border part of the design. As he said the deep cuts will allow you to make those dive cuts for the shading. As for the letter I would add that the parallel lines should be back cut so they continue completely from one side of the letter to the other. This will make the width of the line more even and will allow you to adjust a little on the spacing between the lines.
 

thughes

:::Pledge Member:::
::::Pledge Member::::
Joined
Sep 28, 2010
Messages
838
Location
Nashville TN
Thanks Tira, it's great to hear from you. Here is a stupid question, what exactly do you mean by "back cutting"? Guess I wasn't paying attention that day in class, huh? I'm assuming you mean make your cut, then turn around and go back in the direction you started from so that you can end the cut cleanly, and I guess this lets you avoid starting to close to the main line and screwing it up.

Also another generic question for you, sam, andrew, and anybody else. What tool geometry do ya'll use for shading. Shading seems to be the biggest (by no means the only, just the worst) thing I'm struggling with. I probably know the answer, it's just a matter of tool control and experience, but I was just wondering. I seem to either make just a scratch or a big ole ugly gouge. Would a longer heel make it easier to get consistent shading lines? Well that and more practice. probably a question for a whole new thread.

Thanks
 

Andrew Biggs

Moderator
Joined
Nov 10, 2006
Messages
5,034
Location
Christchurch, New Zealand
I'm assuming you mean make your cut, then turn around and go back in the direction you started from so that you can end the cut cleanly, and I guess this lets you avoid starting to close to the main line and screwing it up.

Yes

I probably know the answer, it's just a matter of tool control and experience

Yes

I use a 90 square graver for just about all shading with a short heel. In fact I use a short heel for just about everything. Others will have different tool geometry. It doesn't really mater because it all comes back to.................you guessed it...............tool control and experience :)

Cheers
Andrew

PS. I will add another factor............confidence
 
Last edited:

thughes

:::Pledge Member:::
::::Pledge Member::::
Joined
Sep 28, 2010
Messages
838
Location
Nashville TN
Andrew,
Thanks. Same ole, same ole. Good equipment just will not cover up that lack of ability. That was one reason why I loved competitive skeet shooting. Equipment just really didn't matter. When it came time for shoot-offs at the main field, my lowly browning looked pretty sad sitting there in the rack next to all those $20,000 Kolars and Krieghoffs. But I still won my fair share.

Maby when I've put as much practice into this engraving thing as I did into skeet shooting, i won't be so embarassed to put my photos up here :)
 

Tira

~ Elite 1000 Member ~
Joined
Nov 9, 2006
Messages
1,551
Location
Doylestown, PA
Yes, the back cut is what you described. It is almost impossible to start the cut as cleanly as you can come back and finish it (unless you are starting in an existing cut). There is a huge difference in a design that is back cut and not, but it is subtle. If you look at a design with back cutting and a design where it has not been done your eye will gravitate to the design that was "finished." The back cuts can also allow you to slightly adjust line flow (think making the scroll more circular at junctions) and it completes the design as the eye follows to the intersections.

Shading is a large topic. You can shade with many gravers. I prefer a 110, I think Sam prefers the 120 and many prefer the 90. The main technique is to start with barely a scratch (think of having the heel just ride on the surface of the metal) and to dive at a gradual angle so the end of the cut is wider and deep. One way to do this is to start near the end of a practice plate and to engrave towards the edge. This will help you with 2 things. One, you can dive as deep as you want and the chip will release easily due to the edge. And two, it makes you have control so that the tool doesn't go careening off the edge. It is the same control that will allow you to cleanly finish the cut and not overrun the tool into the other side wall making a mark. It will also allow you to make consistent marks without worrying about the design. Make some short 1/4 inch cuts and make others longer. Repetition and technique will help your shading. Good luck.
 

Latest posts

Sponsors

Top