Bulino cat

Barry Lee Hands

~ Elite 1000 Member ~
Joined
Feb 7, 2007
Messages
1,272
Location
Las Vegas
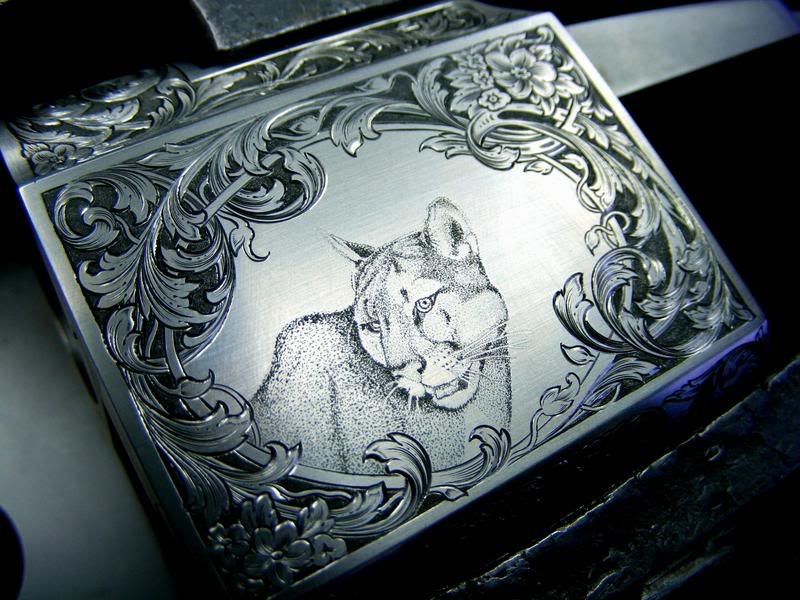
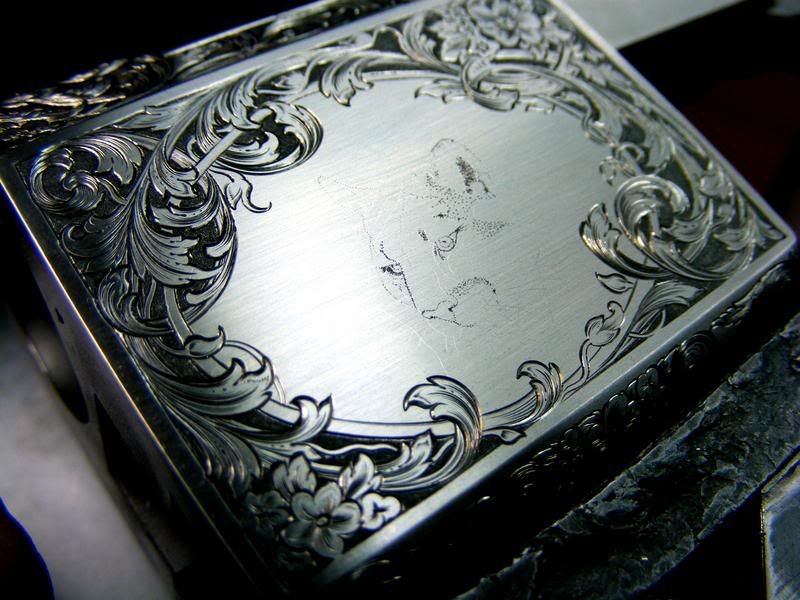
I am putting a Mountain Lion on a project and thought you may like to see how I go about it. The primary lines are lightly scribed, and I am just starting to put some dots in. The eyes are one of the first things I locate. Then I do the edges, and darkest places.
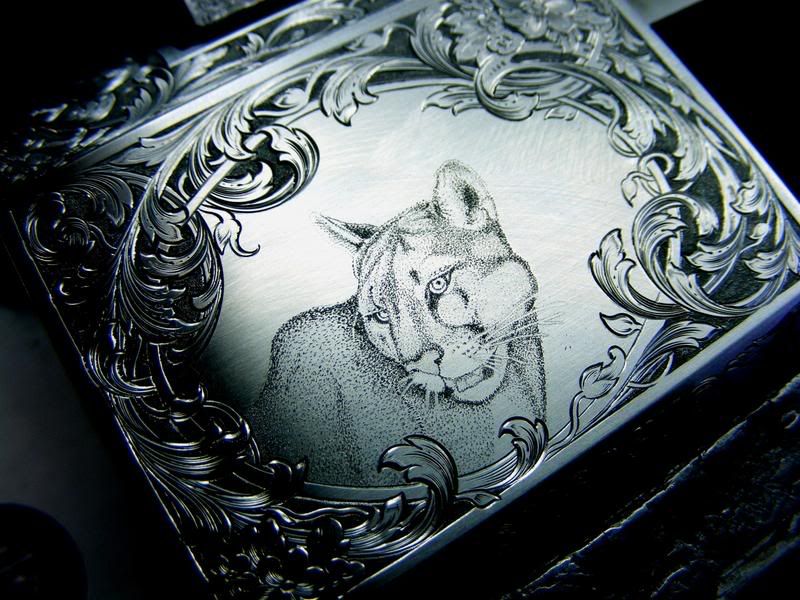
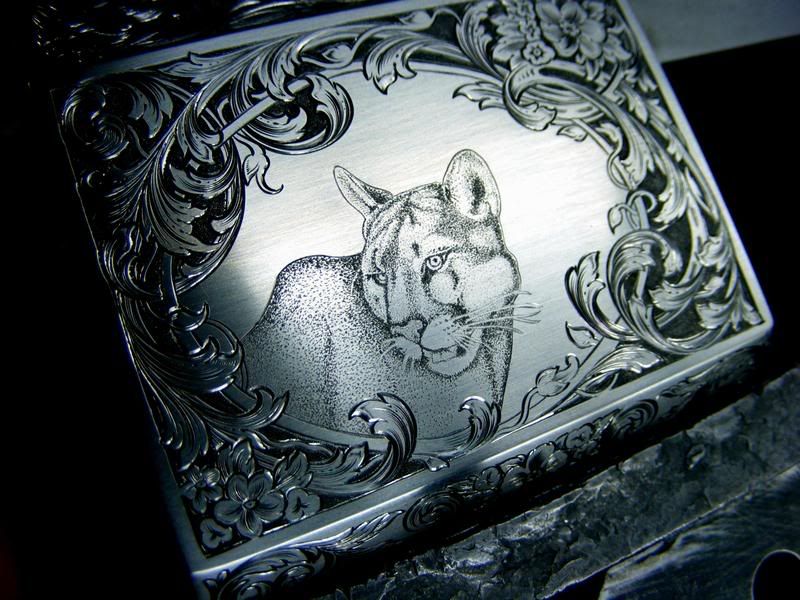
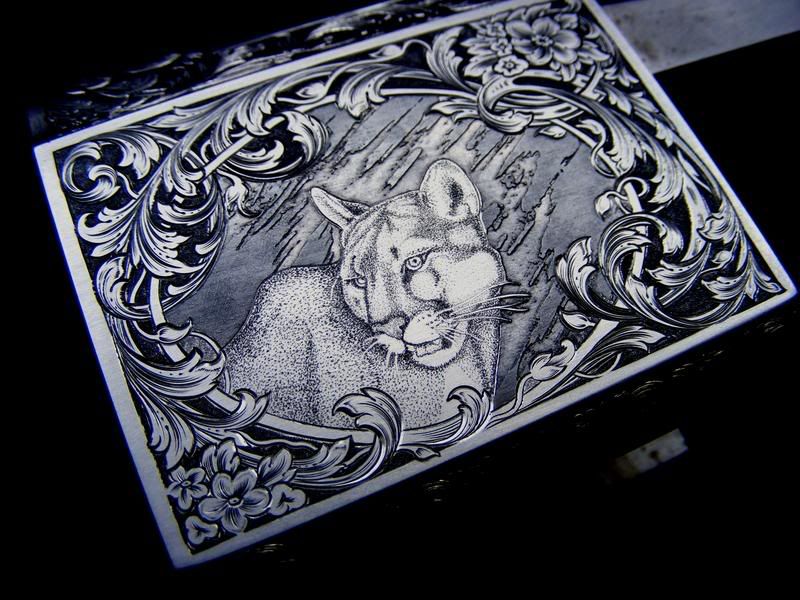
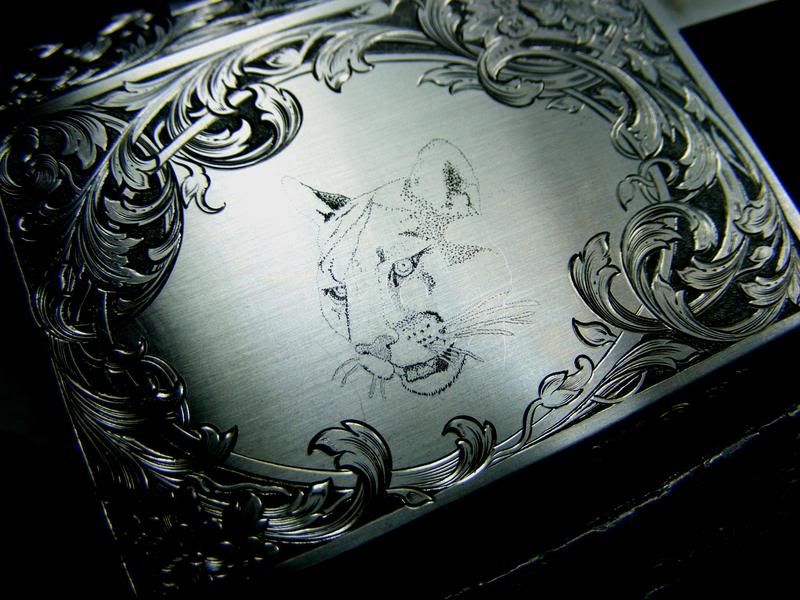
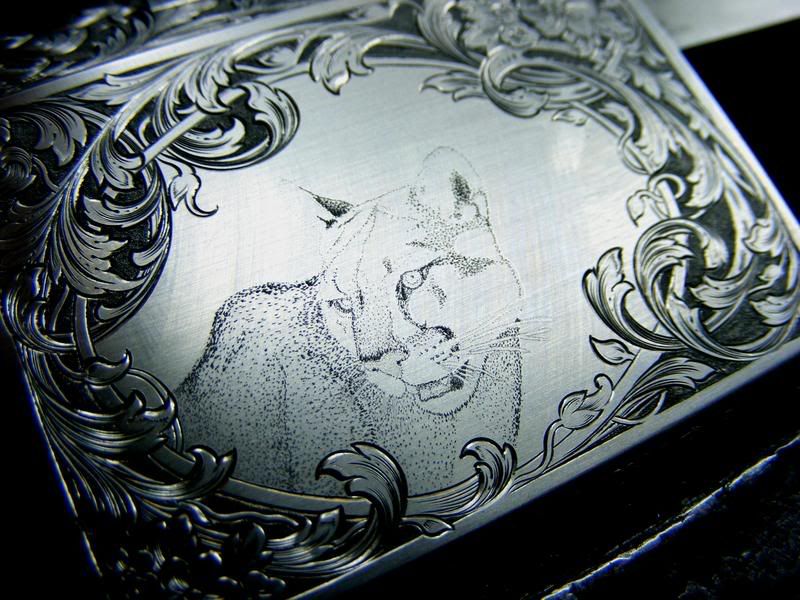
Then I do a little more, and a little more. . . .


vanknife

Elite Cafe Member
Joined
Feb 16, 2007
Messages
420
Location
Pretoria South Africa
Picture Perfect

Good day Barry,
As always is it a great pleasure to take a look at your work and all I can think off is "Picture perfect" to say the least and thanks for the series of pictures it is worth its weight in gold for a beginner like me.

Regards
 
Last edited:

Sam

Chief Administrator & Benevolent Dictator
Staff member
Joined
Nov 6, 2006
Messages
10,491
Location
Covington, Louisiana
Beautiful job and a very nice photo series, Barry. Thanks for your post, and I've added it to the Tips Archive. / Sam
 

JCP

Member
Joined
Jan 21, 2007
Messages
75
Location
Elkin N.C.
Barry , that is beautiful.

What type tool shapes did you use for the dots?
Are the whiskers scribed or cut?
 

Mike Cirelli

~ Elite 1000 Member ~
Joined
Nov 8, 2006
Messages
1,690
Location
Western PA
Very nice Barry, that background pulled the cat right out of the metal. The background looks like it's etched in.
 

Ranchman

Elite Cafe Member
Joined
Jan 25, 2007
Messages
138
Location
Colorado
Fantastic, at each shot that cat becomes more alive. The last one looks like he could jump right out at you. Thank you for taking the time making the series of pictures. We have many mountain lions here where I live. Although seeing them is rare. When you do see one the first thing that comes to mind is their strength. You really captured that in your engraving.

A beginners question. Is there a particular reason to do the scroll work first then the portrait.

Thank you,
Jeff
 

sdcoxx

Elite Cafe Member
Joined
Nov 10, 2006
Messages
295
Location
Glitter Gultch, Nv
Barry,
Thank you for the great series of photos....
Tell us more about making the dots....
Is this a silver or steel buckle?
It appears the photos are taken under the scope, are you using a a mirror or glass to refect/defuse the light?
How do you get such good photos?
Thank you for sharing this very helpful tutorial for improving our engraving skills.
Stephen
 

Christiaan

Elite Cafe Member
Joined
Sep 20, 2007
Messages
267
Location
South Africa
Barry, Thanks you so much for the excellent posting. I do some leatherwork and learned a few new things. A lot actually. Thanks again.
 

Barry Lee Hands

~ Elite 1000 Member ~
Joined
Feb 7, 2007
Messages
1,272
Location
Las Vegas
Thanks Sam and Andrew and friends, Mike, you are correct, the background is etched.
Jeff and Mike, I am using the new 70 degree Lindsay bulino tool template from the Lindsay sharpening system to sharpen the graver.
The dots are actually tiny triangular , or when done properly rhombus or diamond shaped cuts. They are put in one at a time, by hand with a single point 70 degree side angle graver.
Each dot is placed VERY carefully, but i can place 4 or five in a second.
A dark area is made by placing more dots, the size does vary, but in theory, really should not. The blackness of each dot is determined by the sharpness of the engraving tool, as when it is sharp, it leaves a mark that traps light, and will not reflect it.
The mountain lion is Bulino, the leaves and scroll around it are chiseled, or, chased.
Stephen thanks, The key to good photos is having it look good through the viewfinder before you click the shutter.
The project is on a single shot rifle action.
 
Last edited:

ddushane

~ Elite 1000 Member ~
Joined
Jan 7, 2007
Messages
1,016
Location
Andrews, TX
Mr. Hands, Thank you for posting all the steps, Beautiful job. I've been hearing of you the last couple of days but hadn't remembered seeing any posts from you, memory is not that great :( Anyway I was told your engraving is outstanding but didn't know until now. It is awesome, Dwayne
 

pappy

Elite Cafe Member
Joined
Nov 27, 2007
Messages
156
Location
Weatherly, Pennsylvania
Mr. Hands,
First of all, thanks for posting. I am just a begginner but I have always loved bulino. I tried some myself but with a 60 deg. tool (although I don't know if 10 deg. makes that much difference?) sharpened like the one like on Sam's sharpening video, but the results were terrible! One of my problems was I wasn't making big enough dots, seeing your cat on the side of what I think is a Ruger #1 really helps get a sense of scale. I can see where the dots are done in a line, like the whiskers, and in patches where you want them darker.
Also, I was trying to work from a transfered image, and that didn't work well for me. Do you have a reference drawing that you keep referring to? Also, is the 70 deg. point you are using that different in shape from what Sam's video shows? Also did you finish the cat off by doing a light single point cut around the outline? Sorry for all the questions, but you have gotten me excited enough to try again! I thought I was going to have to wait to take a class to figure out how to go about it. Thanks so much!!!
 

Barry Lee Hands

~ Elite 1000 Member ~
Joined
Feb 7, 2007
Messages
1,272
Location
Las Vegas
Thanks Guys,
Pappy, I cant find where I put the drawing, but if you work from a photo or drawing to a transfer , you can draw or print out the original art, or photocopy it, and reduce it to a simple line drawing. very simple. Then transfer that and scribe the major lines on, and then remove the ink with solvent.
And there are many, many other ways to transfer.
I actually looked at about three different cat pics whaile I was putting on the dots.
I find a 70 superior to a sixty for bulino, but others may find different.
I don't know how Sam sharpens a bulino tip. I have not seen Sam's vid, but I am sure it is full of good info, as he is an excellent engraver.. You might ask him what he does.
On the whiskers, there are no dots, the dots are there around the whiskers.
I did do a light cut around the edge when it was finished.
The best way to learn is by doing, give it a try. . . .
hope that helps
B
 

Latest posts

Sponsors

Top