Question: Shading

CRW

Elite Cafe Member
Joined
Oct 10, 2008
Messages
314
Location
Daphne, AL 36526
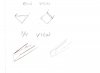
A quick question, should a shading graver be sharpened with a tiny heal, a longer than usual heal, or no heal at all? I have tried the 90 degree and the 120 degree gravers and I am having a lot of trouble getting it to go where I want. Probably tool control, but I am not sure. Also while I am asking, should the face be a lot smaller than a normal cutting graver. The reason I am asking is that I am having trouble seeing the point in order to set the lines real close together. I have used a sharpie to blacken the point, but does not seem to help a lot.

Thanks for any input.
 

D.DOUGLAS

Elite Cafe Member
Joined
Nov 10, 2006
Messages
296
Location
Princeville,ILLINOIS
Hi Carl, I find it helps to make a very small tool. I use a very small heels also. Hope you caught some fish after the engrave in. Doug S.
 

Tira

~ Elite 1000 Member ~
Joined
Nov 9, 2006
Messages
1,551
Location
Doylestown, PA
Carl, You should be able to shade with either the 90 or the 120. I would say pick the tool you feel most comfortable with on a normal cutting basis and start with that one. I usually shade with the same heel I have on the tool all the time, but it's quite small (probably about 1/4 mm). The regular heel works better for me than the parallel heel for shading. It seems that it starts out very thin by just lightly pushing the centerline of the tool on the metal (lightly). Then as it gets going you can start to dive in a controlled manner and it should go uniformly from thin to thick. If you are using the parallel heel, then you need to have more tool control to get it to dive in a uniform way. As for the size of the face of the tool... If you have control you can cut with any size tool, however, as you say - if the size is cut down you can see better. I use a blue sharpie on the face to cut the shine and also to give me a good visual about where the entire face is at any given time. It seems to help me in tip placement and also when I'm leaning the tool I can judge the relation of the tool to what's around it better.
 

CRW

Elite Cafe Member
Joined
Oct 10, 2008
Messages
314
Location
Daphne, AL 36526
Doug, Thanks for the tip on the graver. After the engrave in on Thursday I caught 5 bass (limit) that would have weighed about 18 lbs. It was a real good day for me since it has been almost 2 years since I have done any bass fishing. Thanks for asking. It was good to meet you at the shin dig.

Tira.
Thanks so much for the information on the gravers that you use. I am using the parallel point since I am not sure what other kind you are talking about. I suppose I need to get up on my terminology :) The heal that I use is not much thicker than a hair, very small. I find this heal that I use is best for me at my level for cutting. I might have to try one a little larger. Oh well tomorrow is another day, I will play around with it, and let you know how it turns out.
 

Andrew Biggs

Moderator
Joined
Nov 10, 2006
Messages
5,034
Location
Christchurch, New Zealand
A couple of things that may help.

Your heel may indeed be just a tad too small. Find the length that suits you. It may take a bit of experimenting.

Relax your grip on the tool. Hold it softly and relax.

Make sure your graver is sharp and by sharp, I mean razor sharp. When cutting hairlines it can make a big difference.

Grind your tool so you can see the tip.................otherwise you are driving blind.

Try the Zen approach................visualize where you want the graver tip to end up and let your mind hand take you there. Sounds a bit silly but that's what tennis players and cricketers do all the time. Don't concentrate on where your tool tip is...........concentrate beyond that grasshopper!! :)

OK, that was 5 things :)

Cheers
Andrew
 

Glenn

Elite Cafe Member
Joined
Nov 9, 2006
Messages
714
Andrew if we ever get an engraving basket ball team together, I want you to be the coach.
Your advice is always sage. Thanks a bunch.:party:
 

CRW

Elite Cafe Member
Joined
Oct 10, 2008
Messages
314
Location
Daphne, AL 36526
Many Thanks to all of you for your tips on shading. It is much appreciated.
I'm with you Glenn, Andrew would make a fabulous coach. I know he is sure a good coach when it comes to engraving.

I will put these tips to the test today and tell you what works for me.
:beerchug:
 

Kevin P.

~ Elite 1000 Member ~
Joined
Feb 28, 2008
Messages
1,256
Location
Nambe, NM
Carl, I use a 120 tapered, very small face. The last thing is I put a small facet near the tip (on the tapered part) to remind myself, and as a guide to keep the graver properly oriented.
What Andrew says about holding the graver softly is critical (at least for me). When I have the graver in a death grip things go amiss.
Kevin P.
 

doug

Member
Joined
Apr 11, 2009
Messages
88
Location
Hillsboro,Ohio
Tira I just started engraving a few months ago.I was wondering if you would tell me the difference between a parrellel heel and a regular heel.
 

Tira

~ Elite 1000 Member ~
Joined
Nov 9, 2006
Messages
1,551
Location
Doylestown, PA
Doug, What I refer to as a regular heel (or a traditional heel) looks like 2 triangles coming together at the centerline on the bottom of the tool. Sam has a good drawing of this on his igraver site here:

Sam's 120 Graver Sharpening

In the parallel heel (or V heel) the facet goes parallel up the side of the graver from the tip to the side wall. It is parallel to where the face meets the belly and is the same width for the entire facet. This allows you to shave a side wall in relief engraving, for instance, by using the entire front side of the face. It gives you a smaller area where the facets come together on the bottom. It's 3am right now so I'm not going to go and take a picture for you, but I'll try to get a picture of this tomorrow and post it.

Here is an example of a parallel heel on an onglette from Mick Cirelli:

Mike Cirelli's onglette parallel heel

As you can see the facet follows up the side of the onglette. On a square or 120 it would follow the facet on the bottom all the way to the side wall.

Both heels are useful for different applications. Some people prefer one over another and that works for them so they stick to it, others go back and forth between the grinds.
 

CRW

Elite Cafe Member
Joined
Oct 10, 2008
Messages
314
Location
Daphne, AL 36526
Tira,

Thanks for the great explanation. It was a help to me also. Years ago I read Meeks book and I thought that was probably the same heel that you were referring too.

:beerchug:
 

Lee

~ Elite 1000 Member ~
Joined
Nov 17, 2006
Messages
1,047
This is a rather primitive drawing but it may help some. A few years ago I switched from relieving the top as a flat to relieving the top at an angle. This leaves a line along the top almost to the tip and makes it easier for my eye to visually make the jump from this line to the tip. to grind the flat top we flip the graver over and grind away. To leave the the top with a line, flip it over and then rotate back. I use 30 degrees but it really doesn't matter it could be 10 or 45. After grinding one side rotate to the other side the same degrees. All you are doing is resurfacing the top. It's the same thing we do when we change a 90 to a 120. Just do it on the top.
 

Attachments

  • graver grind.jpg
    graver grind.jpg
    12.4 KB · Views: 86

Lee

~ Elite 1000 Member ~
Joined
Nov 17, 2006
Messages
1,047
Better picture...kind of
 

Attachments

  • graver grind.jpg
    graver grind.jpg
    17.1 KB · Views: 83

doug

Member
Joined
Apr 11, 2009
Messages
88
Location
Hillsboro,Ohio
Thanks Tira (a year late) I guess I missed your reply sorry about that.I have since figured out the diferance between the two types of heels but thanks for taking the time to explain it so well.
Doug
 

Latest posts

Sponsors

Top