Playing with Titanium

santos

Elite Cafe Member
Joined
Nov 12, 2006
Messages
360
Location
France
Hi everybody,

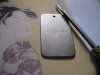
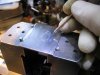
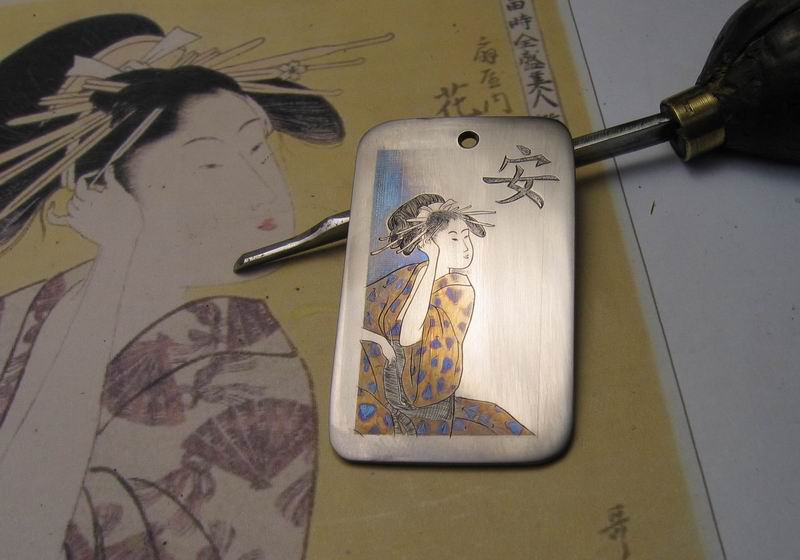
I want to show you a practice plate I’ve just finished. This plate is a titanium alloy( I don't know exactly what) , it’s the first time I try to engrave Ti, and this one is quite soft.
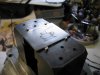
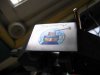
The model is the same that I’ve engraved in a kitchen knife a few weeks ago: An Utamaro’s print , I’ve found in the Boston MFA website.

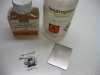
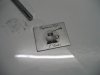
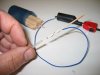
After the engraving, I’ve coloured the kimono by means of anodization. Titanium is very funny to anodize, in a few seconds you can obtain a colour depending on the value of voltage . In that example the kimono is anodized with 15V and the resulting colour is bronze. The fan on the silk of the kimono where coloured with a voltage of 24V.The background is a 30 volts blue.
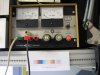
My power supply doesn’t exceed 30V , and the amperage for the anodization is less than 0,1 A.
More colours are obtained with higher voltages, but it would be dangerous to go above 50V.:mad:
The practice plate became a little pendant for a friend :) I've engraved her name in the corner. It's approx. 3X5 cm

Voilà :


Thanks for looking

Regards


Jean
 
Joined
Nov 28, 2006
Messages
96
Location
New Port Richey Fl.
Hi Santos: In my knifemaking experience I have found that the softer Ti is usually closer to what is called commercially pure, if you try 6alv or aircraft grade it is much harder and will take color almost as easily as cp, email me from my davenportknives.com and I will send you a sample of the aircraft grade to try.
 

Dmitry Martinov

Elite Cafe Member
Joined
Dec 20, 2006
Messages
168
Location
Latvia, Riga
very beautifull santos If you do not mind here is some questions:
1. what kind of titanium you were using to engrave? As I understand there is about 40 different titanium alloys (grades).
2. would you be so kind to give some more info about the process af anodizing and equipment.
 

santos

Elite Cafe Member
Joined
Nov 12, 2006
Messages
360
Location
France
Thank you

Thank you all for your nice comments. It’s not a great engraving but I like this one…:)

Dmitry , I don’t know the grade of this titanium alloy . It’s a small piece that a friend gives me. Its thickness is 2mm and it as a very rough aspect (look at the photo of the back of my plate) It was really hard to get a nice surface using sandpaper, but then it was really easy to cut with my carbide V graver 120° and 60° face. The cuts aren't very bright although my heel was very polished with a 3µ lap.

I’ll be very happy to explain you the process and the recipe of the electrolyte, but with my English, it will be easier to show you a few step by step photos.
I’ll engrave another practice plate , take some photos and post them soon.

The main tool for anodizing Ti, is the power supply, one like these you can find in electronics labs with variable voltage output (from 0 to 50V DC). The second very important tool is a wood toothpick that is soaked with the electrolyte. The tip of the toothpick acts as a pencil and working under the scope, you can anodize very small areas with a great precision. You don’t need to mask any area, and you don’t need any bath. Colouring this engraving takes less than 1/4 of hour.;)


Greetings

Jean
 

Attachments

  • Resize of IMG_8088.JPG
    Resize of IMG_8088.JPG
    55.3 KB · Views: 93
Last edited:

santos

Elite Cafe Member
Joined
Nov 12, 2006
Messages
360
Location
France
Here's the step by step I've promised :

1 The drawing is printed on a transparency with a laser printer in which I have disabled the furnace.
2 The transfer is done with 50%Damar varnish and 50% Isopropylic alcohol on the Ti plate
3 The plate is now engraved and shaded
4 A telephonic wire is wrapped around a toothpick , at 5 mm from the tip . A silicon pipe prevents the short-circuits between the wire and the plate.
5 The voltage of the power supply is then adjusted depending on the colour you want to paint , the spectrum is above . The positive lead is connected to the vise and the negative is connected to the toothpick.
6 The electrolyte recipe : 1 g of Ammonium sulphate diluted in 20 ml of water
 

Attachments

  • Tuto1.JPG
    Tuto1.JPG
    33.9 KB · Views: 81
  • Tuto2.JPG
    Tuto2.JPG
    26.7 KB · Views: 84
  • Tuto3.JPG
    Tuto3.JPG
    47.8 KB · Views: 87
  • Tuto4.JPG
    Tuto4.JPG
    39.9 KB · Views: 89
  • Tuto5 .JPG
    Tuto5 .JPG
    57.5 KB · Views: 85
  • Tuto6.JPG
    Tuto6.JPG
    65.4 KB · Views: 87

santos

Elite Cafe Member
Joined
Nov 12, 2006
Messages
360
Location
France
7 The electrode is soak with the electrolyte and then it’s like a pen , the colour instantly appears
8 Here’s the plate finished; It’s a little massacre of a well known logo , and I beg your pardon for that . Next time I’ll try to follow the 4th commandment: “Thou shalt never be in a rush which causes thy work to suffer…â€￾;)
 

Attachments

  • Tuto7.JPG
    Tuto7.JPG
    50.2 KB · Views: 96
  • Tuto8.JPG
    Tuto8.JPG
    32.7 KB · Views: 106

KCSteve

~ Elite 1000 Member ~
Joined
Jun 19, 2007
Messages
2,882
Location
Kansas City, MO
Thanks for the step-by-step demo!

I had heard before how easy it is to annodize Titanium - you can do it with a wad of aluminum foil, a 9v battery and diet soda - but this is the first tutorial I've seen on doing a simple and controlled job of it.
 

monk

Moderator
Staff member
::::Pledge Member::::
Joined
Feb 11, 2007
Messages
10,870
Location
washington, pa
quite interesting. will this technique work with other metals ? or just titanium ?
 

Dmitry Martinov

Elite Cafe Member
Joined
Dec 20, 2006
Messages
168
Location
Latvia, Riga
thank you santos, very informative.
P.S. It's a lot of supplyers with different prices, sizes and minimum amount of purchasing. Where do you buy Ti in Europe?
 
Last edited:

Powderhorn

Elite Cafe Member
Joined
May 24, 2007
Messages
274
Location
Henderson, NV
Monk;
If you want to you can also anodize Niobium. It is done the same as Santos says for the Ti, but you use TSP for the electrolyte.
 

Latest posts

Sponsors

Top