https://www.youtube.com/watch?v=y4vF9tgiLog
Dear all,
This is my first post and i'm new to the engraving scene. I thought I'd introduce myself with a video.
I have wanted to learn to engrave for a while, however, apart from online resources, I do not have easy access to lessons. Eventually, I finally decided to build an engraving machine. - Thanks to Sean Hughes for the inspiration and time he takes to create his videos. Since building the machine, the engraving I have been learning is by trial and error.
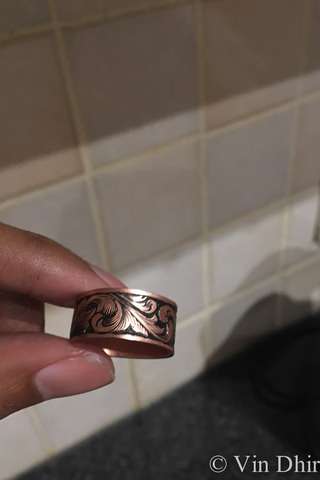
Above is a sped up video of some engraving practice. There were 2 graver slips - nothing major. The thermoplastic bulge made that section of engraving difficult - mistake now learned from. The design follows a scroll pattern along one axis. I am using an optivisor type device for magnification, and a small LED light source.
Please feel free to give tips to help me improve.
Kind regards,
Vin
Dear all,
This is my first post and i'm new to the engraving scene. I thought I'd introduce myself with a video.
I have wanted to learn to engrave for a while, however, apart from online resources, I do not have easy access to lessons. Eventually, I finally decided to build an engraving machine. - Thanks to Sean Hughes for the inspiration and time he takes to create his videos. Since building the machine, the engraving I have been learning is by trial and error.
Above is a sped up video of some engraving practice. There were 2 graver slips - nothing major. The thermoplastic bulge made that section of engraving difficult - mistake now learned from. The design follows a scroll pattern along one axis. I am using an optivisor type device for magnification, and a small LED light source.
Please feel free to give tips to help me improve.
Kind regards,
Vin