tayloredcreations
Member
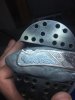
I am currently working on a knife that many of you have likely seen from other posts and I am currently on the background removal of the knife. I was curious as to what you guys use for the removal. Currently I am using a 0.5mm bur on the more open spots and a 90 degree graver for the tight areas. Are there advantages to certain methods?