brightcut script lettering graver

atexascowboy2011

Elite Cafe Member
Joined
Feb 13, 2012
Messages
997
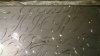
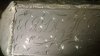
I like to spread about an 1/8" layer of Bondo under the piece and slightly around the edges to contain the piece.
You can slightly heat the metal with a torch to break the bond after engraving.
As far as lubes there are MANY avenues.
I like "Three in One" oil myself.
I take a small "Carmex" container stuffed with cotton, apply a few drops (meaning enough to lightly saturate the cotton) and pop or drill a hole in the top to accommodate my graver point.
After two or three cuts, I'll dip the point again to relube it. You just want a film, not a drop on the tip.

Back to the heel polish, I was taught to take 4/0 sandpaper, rub a #2 pencil on its side to fill in the pores, then rub the heel of the graver side to side to complete the polish.

Whoops!
I forgot to tell you to fix a 3/4" thick piece of wood as a backing for your Bondo to support your metal.
 
Last edited:

Big-Un

~ Elite 1000 Member ~
Joined
Nov 10, 2006
Messages
1,370
Location
Eden, NC
In my humble opinion, study lettering LAYOUT from either a jewelry engravers manual or from calligraphy manuals. Not only will you realize the proper way letters relate to each other but the space relationship. Then, while practicing cutting with proper layout you're also building muscle memory with eye coordination. One thing I do when cutting letters is draw it in completely with the right slant if script ( or any other font, as they all have some sort of slant, even vertical at times) and then I cut the letters in reverse of reading it and/or upside down to eliminate my mind taking over by reading the word instead of concentrating on cutting. Do this even with your scribbles and practice cuts. PUT EVERYTHING IN ORDER, don't just cut haphazardly, especially when practicing. Your practice plates are way too disorderly.

Bill
 
Last edited:

tim halloran

Elite Cafe Member
Joined
Jun 10, 2008
Messages
317
Location
Blue Grass, IOWA
Indy Joneds: Try using a 120 degree graver, even Sam uses one to cut script. Buy his jewelry engraving video, it's all explained there. Also I use a 120 to cut script.
 

handengraver

Elite Cafe Member
Joined
Jun 23, 2009
Messages
180
Location
San Antonio, TX. USA
You will sure get there. Please, watch for the uniform slanting angle of the heavy strokes, and for the even distances of the letter width and the spacing. Best of luck!
 

Sam

Chief Administrator & Benevolent Dictator
Staff member
Joined
Nov 6, 2006
Messages
10,491
Location
Covington, Louisiana
Big-Un gave you good advice and I'll repeat that by saying you should be practicing your cuts with perfectly drawn lettering as opposed to what you're doing. I would also suggest practicing on soft steel, brass, or copper. Keep the radiused heel short...about 1/4mm.

Brian Marshall was also willing to help but you scared him away.

A 120 graver can cut script as well, although I normally use a flat.
 

phil

Elite Cafe Member
Joined
Oct 21, 2007
Messages
224
Location
England
Threading produces beautiful results and far more durable lettering. It is possibly easier to develop the tool control that you need when first starting out too. I live only a short distance from you. I can post you some hand cut lettering plates if you like so you can see first hand how the lettering needs to be built. Seeing it in the flesh is worth a hundred hours of reading time. Also it matters not how well the letters are cut unless those letters are graceful and well formed
.
 

Jay Close

Member
Joined
Dec 22, 2008
Messages
18
I hesitate to weigh in here as I am very much a learner myself, but I think you will find the book The Jewelry Engravers' Manual by R. A. Hardy (available from Dover for about ten dollars) very helpful.

I had this book for years before I gave it the attention it warrants. If you read it carefully, and re-read it again, you'll find it contains a comprehensive course in letter engraving. It covers sharpening, letter design, monograms, how to cut each letter, and the layout of inscriptions together with practice exercises.

Of the half dozen or so old engraving manuals I have, this is by far the best. Of course, it is pre-power assist, so all the advise concerns palm tools/push engraving of softer metals, but I think it can all be adapted.

In any event, it is a book well worth having in your library.

Just my two cents.
 

Indy Joneds

Elite Cafe Member
Joined
Feb 13, 2014
Messages
214
Location
Derbyshire England
thank you all for your advice . i will look into that book jay . Phil by threading do you mean ribbon cut lettering ? it would be nice to see your lettering plates phill. i dont have a 120 but i do have the 116 and its a great graver and it can do a nice job of lettering . but i really like the look of the flat cuts. i know my practice plates are all over but im just focusing on how the flat graver was handling and the bad results it was producing and trying to get it to just cut right rather than doing perfect letters at the moment. I tried reducing the impact force which was sugested but it did not solve it , my heel was always short 1/4 mm and radiused from 10 - 20 degrees as described by sam but no joy , still chatter marks and such. but i had a play and i think i got it to cut much better , ill engrave in a bit and load some pics later and let you be the judge . thanks again. Oh and TEX the oil on the cotton works great , thanks for that gem. not sure we got to the bottom of the bondo ? but i used thermo loc to hold the piece to reduce the vibration as you sugested and im sure its much better but the chatter marks remained.
 

Indy Joneds

Elite Cafe Member
Joined
Feb 13, 2014
Messages
214
Location
Derbyshire England
new pics

theres still a number of chattery cuts and dodgy ones but as i got into the swing of it I knew this is how i wanted to be cutting , i saved the big letters for last so they are gernerally the better cutts but theres some other nice ones about. obviously this is all noob standard but im happy with the graver now
 

Attachments

  • WP_20150928_004.jpg
    WP_20150928_004.jpg
    70.8 KB · Views: 99
  • WP_20150928_001.jpg
    WP_20150928_001.jpg
    66 KB · Views: 99
  • WP_20150928_002.jpg
    WP_20150928_002.jpg
    76.1 KB · Views: 100
  • WP_20150928_006.jpg
    WP_20150928_006.jpg
    79.4 KB · Views: 100
  • WP_20150928_007.jpg
    WP_20150928_007.jpg
    75.9 KB · Views: 100
  • WP_20150928_008.jpg
    WP_20150928_008.jpg
    53.3 KB · Views: 100
  • WP_20150928_009.jpg
    WP_20150928_009.jpg
    50.3 KB · Views: 100
  • WP_20150928_010.jpg
    WP_20150928_010.jpg
    60.4 KB · Views: 100
  • WP_20150928_011.jpg
    WP_20150928_011.jpg
    64.2 KB · Views: 100
  • WP_20150928_012.jpg
    WP_20150928_012.jpg
    65.1 KB · Views: 101

Indy Joneds

Elite Cafe Member
Joined
Feb 13, 2014
Messages
214
Location
Derbyshire England
sorry tex im being an idiot, i dont mean chatter marks i mean .. crappy cuts / un smooth cuts , heel marked cuts etc.

the chatter marks i do like ( hammer and graver effect ) sometimes , but i think i prefer without here . and the reuced impact force does/has reduced the chatter marks .

so sorry i confused the heel drag marks for " chattermarks " until now .
 

atexascowboy2011

Elite Cafe Member
Joined
Feb 13, 2012
Messages
997
It also depends on what you are practicing on.
Steel and nickle silver are a lot tougher than Sterling Silver, which cuts like butter after cutting on the others.
Still, all in all you look to be doing very well at where you're at, just keep practicing.
 

Latest posts

Sponsors

Top