
Josephnmora
Member
Hello.
I have a three practice pieces to share. Attempted a few engraving techniques and gold, copper inlay and Gem setting. Engravers Café and You Tube and a couple of classes from Les and Sam’s Videos have great help! Now More & more practice plates.
Going to work on upload my practice pieces.
Tips, suggestion and comments appreciated.
Thank you, Joe
Attachments
-
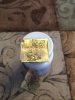 practice 1.jpg68.9 KB · Views: 744
 -
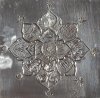 PRACTICE PIECE event - 14456.jpg295.8 KB · Views: 744
 -
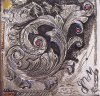 Practice Piece - 2.jpg281.1 KB · Views: 746
Last edited:
")


