Transferring issues

stumpjumper

Member
Joined
Apr 2, 2015
Messages
9
Location
North Carolina
Hello everyone. I am new to the site and I'm very excited to see so many artists here :shock:
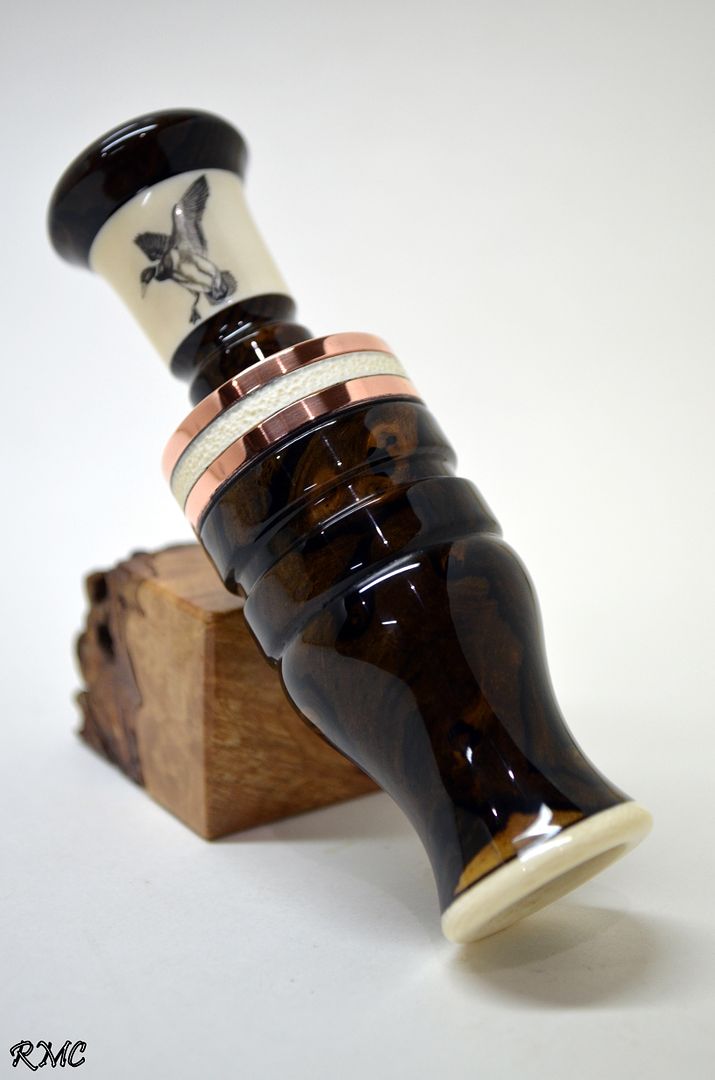
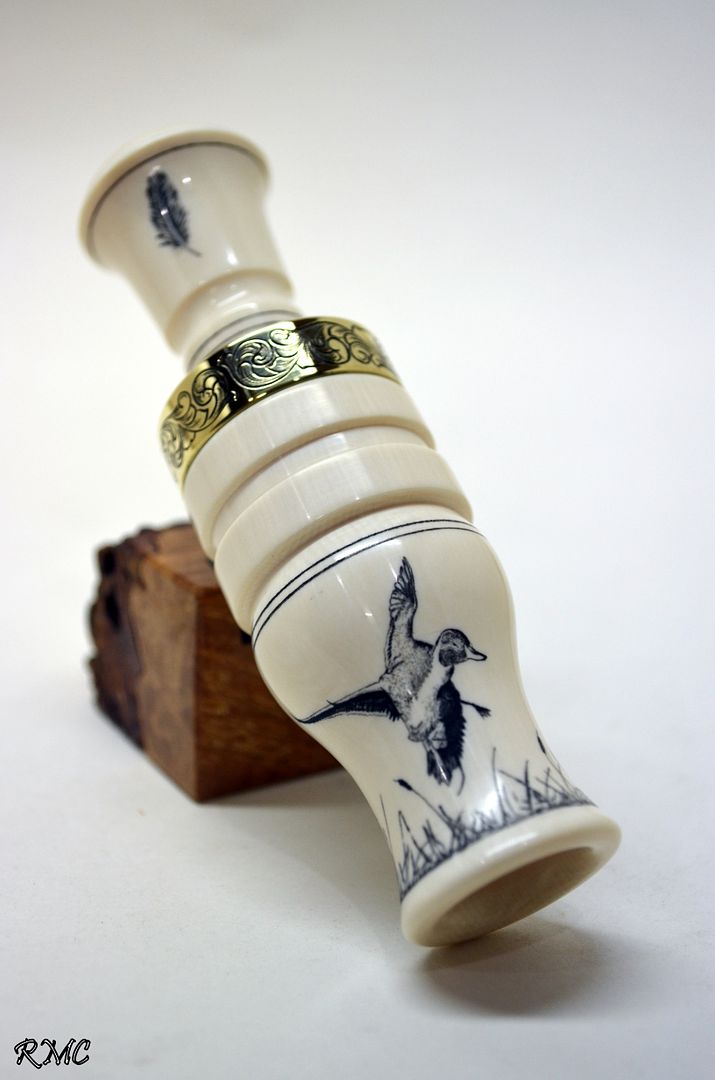
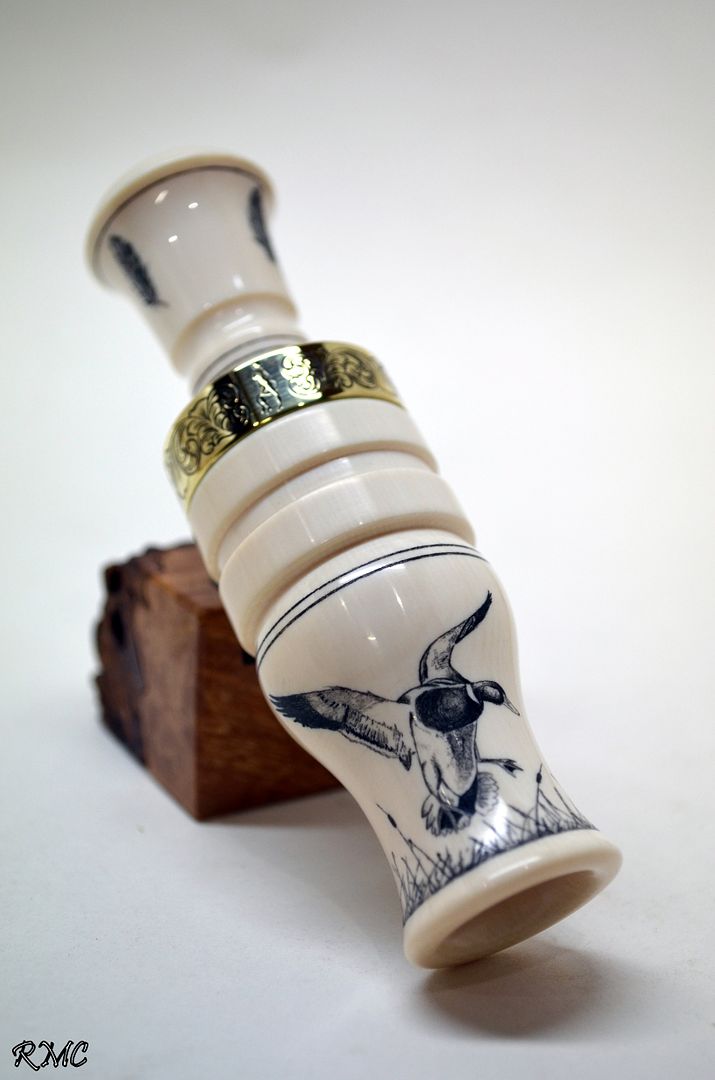
I have been doing ivory scrimshaw on some of my duck calls for awhile. Everyone I do I find that I get more comfortable and better at the craft. However, one thing always kills me....the transfer. I use an old HP Laser Jet 4 Plus to print my transfers. I then use a small piece of tape to hold the image in place on the call. Using nail polish remover I slowly will attempt the transfer (which is difficult as the piece has curvature). I end up with two issues...first is the transfer doesn't always go well...in fact I have a call from Westinghouse micarta that I just cant seem to get a good transfer on. Second is the quality of the transfer itself. The old printer print very pixelated pictures meaning I have alot of work to make everything come alive.
So....I guess I'm asking....is there a better way?

And I figure I should put up a few sample pics of my works....nothing compared to SO MANY of you. Im a call maker first and foremost but I like to add a little flair hence the scrim


STUMP
 

mdengraver

~ Elite 1000 Member ~
Joined
Apr 10, 2007
Messages
3,607
Location
Rockville, MD
I know some of the engravers break up the transfer into sections to eliminate some of the warpage that occurs in the complete transfer on the round. There was a discussion of this awhile back and even experienced engravers have this problem on curved surfaces. Breaking up the image and piecing together seems to minimize some of the distortion that can be corrected by modifying the transfer as you go to make it work.
 

dlilazteca

~ Elite 1000 Member ~
Joined
May 10, 2013
Messages
2,659
Location
Laredo, Texas
Welcome,

Pixelated items are more likly from the source picture the quality must be there from the beginning, you should try .eps format also known as vector images you can re-size them and no pixelation occurs.

As for a transfers if your using a laser printer this might help, used the search function entered laser transfer and this came up there are other results if you wish to look.

http://www.engraverscafe.com/showth...ing-a-Laser-Printer.&highlight=laser+transfer

The tip on breaking up a design on curved surfaces has really helped me, except for that method I use a inkjet printer, different materials and methods for that, you can look it up its all here, what I like is that is is printed on clear transparency paper.

I hope this helps
 

Mike Fennell

Elite Cafe Member
Joined
Apr 6, 2007
Messages
660
Location
Matteson, a south suburb of Chicago.
Pixelation is inherent in the Laserjet printer even at 800 and 1200 dpi. Sam has advised me that the inkjet is capable of greater detail than the Laserjet, but I have not experimented with the inkjet.

Apply a thin coat of Damar varnish to the call and transfer the image onto the varnish while it is still slightly tacky. You will not need the nail polish remover. Simply burnish the image and the varnish will accept the image.

If the image is reluctant to leave the printer paper and adhere to the varnish on the call, then try printing the image onto a square of baker's parchment (bakery section at any grocery) taped to a sheet of typing paper with masking tape, so that the parchment will feed through the printer. The masking tape will survive the heat of a laser printer where most tapes will not.

Now when you burnish the image, the parchment will release every bit of pigment to the Damar varnish that you have applied to the body of the call, even if you are slow and the varnish has dried completely. If parchment is not sufficiently transparent for positioning the image, substitute a suitable transparency. The link provided by Carlos probably contains all you need to know about transparencies.

Here's another trick, if parchment is not available. When you print the image, turn off the printer after the toner has been applied to the paper but before it reaches the heating element to be fused to the paper. On my printer this is a count of 6 seconds after I hit the "print" command. Carefully remove the resulting paper jam and you have the image on the paper but not bonded to the paper. Handle with care, as it will smudge easily when positioning it.

As a further alternative, If you can transfer your image onto Scotch "Magic" tape, that tape will stretch sufficiently to conform with the profile of your call's body. I learned from Mike Dubber to use it to transfer onto the loading gate of Colt SSA revolvers. Some distortion is inevitable, but the result is a good guideline to cut around.

Or, like Sam, you can draw your image directly on the call with a supersharp pencil.

Or, like Manrico Torcoli, you can tape your artwork to the bench next to the call and simply copy it onto the call with your bulino point.

Or, like Joe Rundell, you can just start cutting with no drawings or photos or transfers of any kind.

Maybe someday I will learn to do that.
 
Last edited:

stumpjumper

Member
Joined
Apr 2, 2015
Messages
9
Location
North Carolina
Thanks for the links and the help.
As always, I`m concerned about the materials being that its pre-ban ivory and old old westinghouse micarta.

The reason for what I refer to as pixelated transfers...the old HP laserjet 4 just isn't up to todays standard of detail printers. I have a HP 5520 as well but that simply won`t transfer as the ink locks to the paper. Wonder if the 5520 will transfer using the Damar varnish method.

On the sectional areas for a transfer...I`ve started doing that but its extremely difficult lining things up when they are that small. But I`m gonna try a few more times to see how things go.

Again...THANK YOU kindly

STUMP
 

stumpjumper

Member
Joined
Apr 2, 2015
Messages
9
Location
North Carolina
Just looked up the spec...the HP is an Inkjet printer. So looks like Im going to go look for a new laserjet printer at office max that prints good details

STUMP
 

Doc Mark

~ Elite 1000 Member ~
Joined
Nov 16, 2006
Messages
1,284
Location
Hampton, Virginia
Hey Stump! I don't have any more help on transfers to curved surfaces but I just wanted to comment on your duck calls themselves. Very classy designs and super-clean turning skills. Great work! Have you got a website?
 

stumpjumper

Member
Joined
Apr 2, 2015
Messages
9
Location
North Carolina
I would like to thank everyone for their help! I acquired the Damariscotta varnish and went through the process as described and I'm very happy to report a 100% quality transfer. The removing of the paper took longer than I expected under hot water but it worked. My only fear is doing that with pre band ivory....yikes!
I'll post up some scrim results once I have a chance to set some time aside...but again I thank you

Stump
 

Tim Wells

~ Elite 1000 Member ~
Joined
Nov 9, 2006
Messages
1,331
Location
Dallas, Georgia
For what it's worth, those are the nicest duck calls I've ever seen. I don't even duck hunt and I'd like to own one just for the workmanship of the build and the artwork. Very, very nice.
 

Latest posts

Sponsors

Top